
Help
McKap User Manual
If you are using Maya 2022, make sure you have PyMEL installed.
PyMEL is an open-source Python library that helps with the development of Maya extensions by providing a simplified syntax for common operations.
PyMEL for Python 2 is packaged with Maya and PyMEL for Python 3 can be installed as an optional component with Maya.
Instructions for installing PyMEL can be found on this page (https://knowledge.autodesk.com).
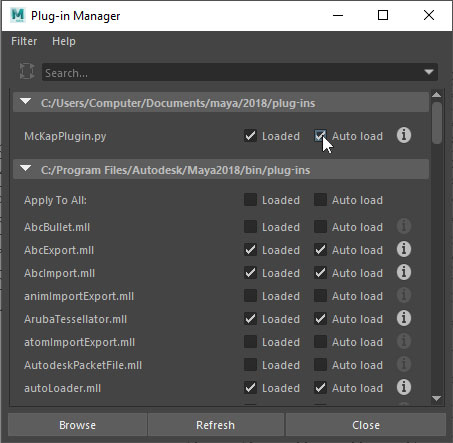
- Go to the Plug-in Manager and locate “McKapPlugin.py”.
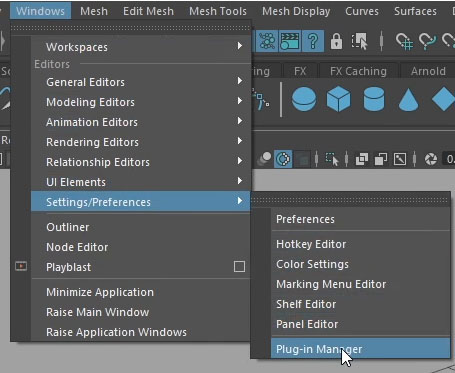
- Check the Loaded and Auto load boxes.
- The Mckap shelf will appear with the McKap button on it.

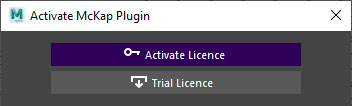
- Click the button to launch McKap.
- On first launch, choose the licence option.
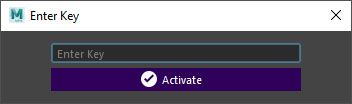
- Your McKap plugin is now ready.
- Open or import your character.
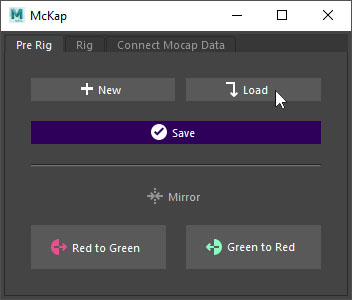
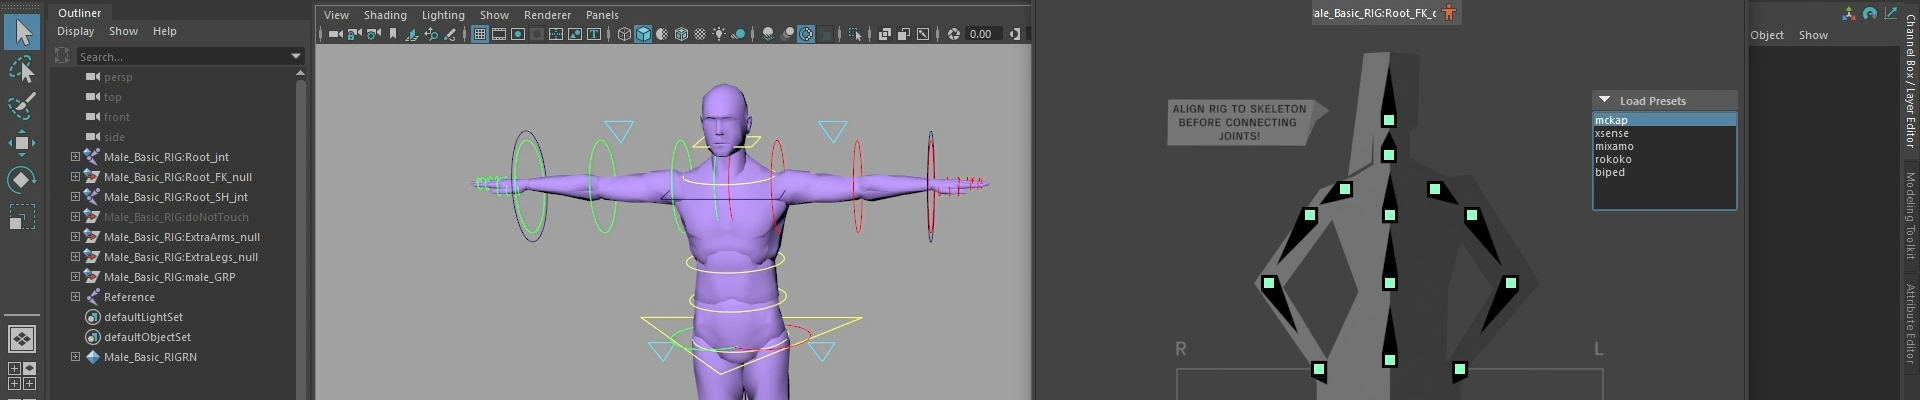
- To get started open McKap, and click the New button on the Pre Rig tab.
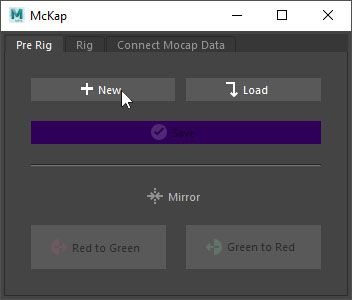
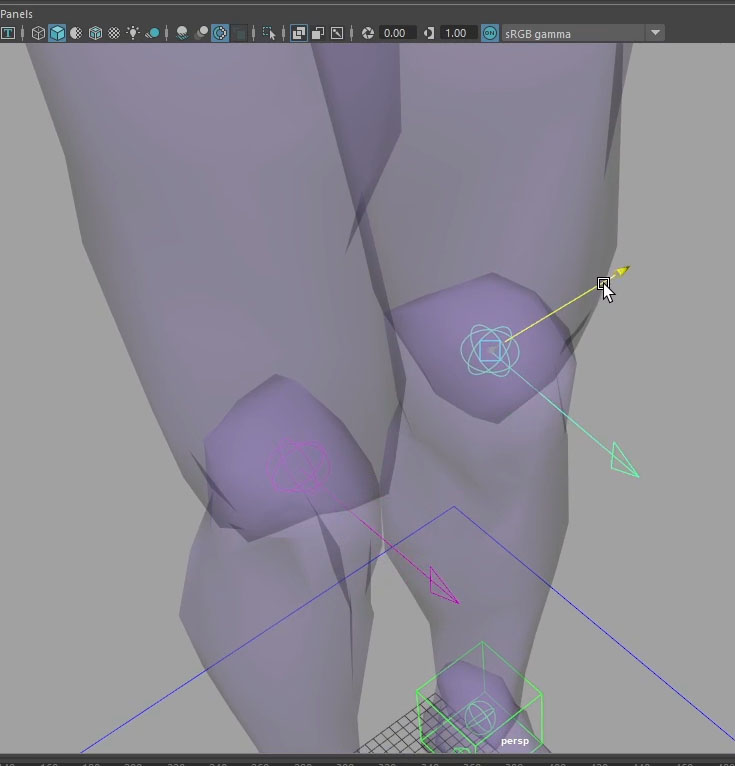
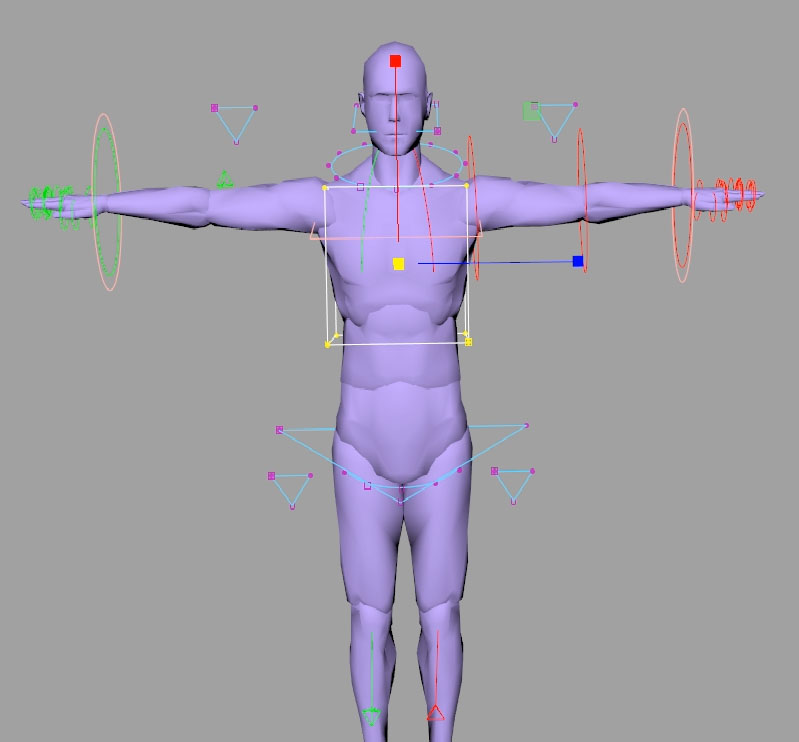
- Allign the shapes with the joints of your character.
- Start with the square shapes to move entire sections.
- Use circular shapes to mark exact joint locations.
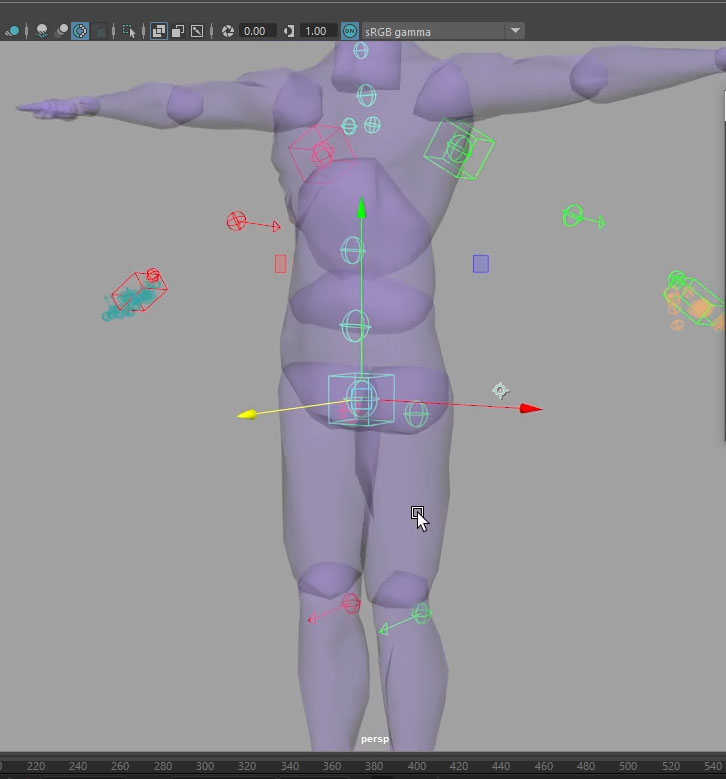
- Note the arrows pointing away from preferred bend direction.
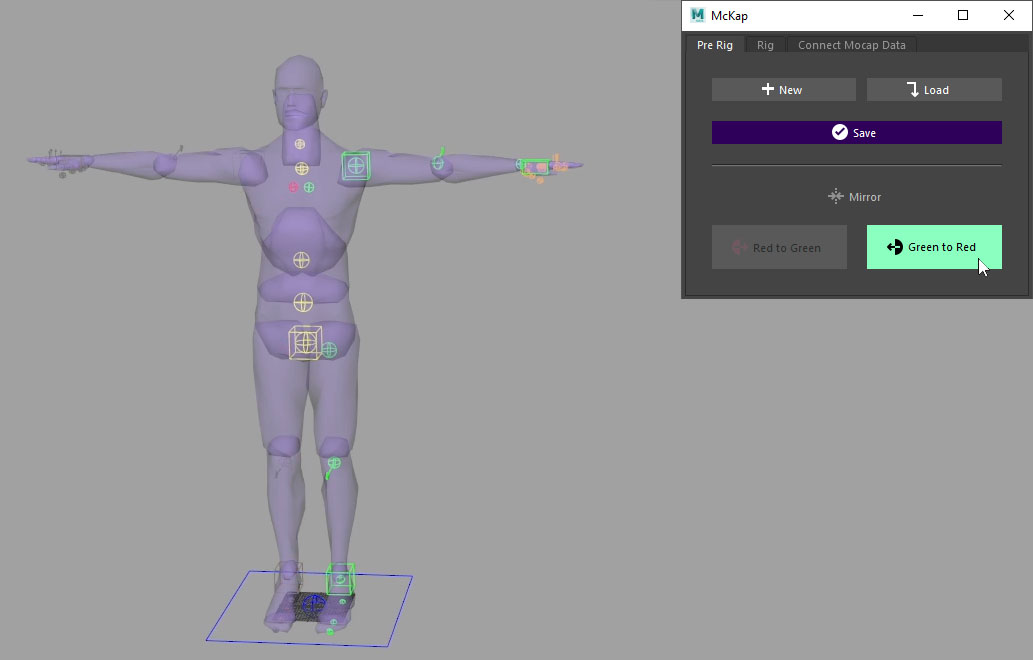
- Use the Mirror buttons for symmetry.
- You can save the Pre Rig setup for your character using the Save button.
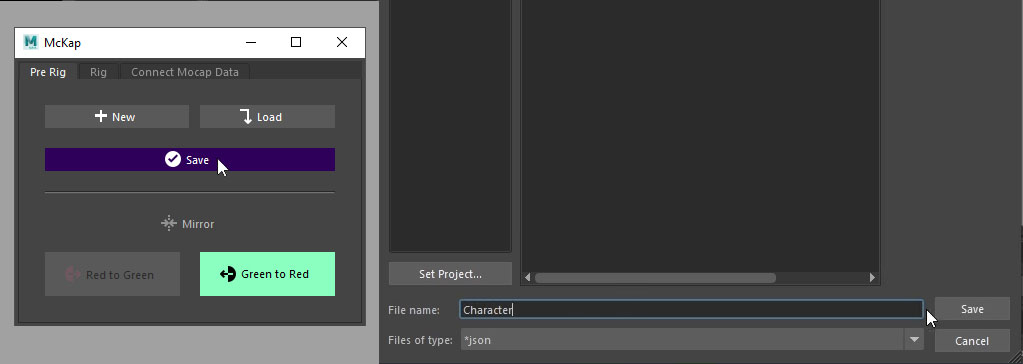
- If you previously saved the Pre Rig setup for your character, you can load it using the Load button.
- Go to the Rig tab of the McKap window.
- Write the number of elbow twist joints you wish to have on the rig.
- Click the Rig button to create the McKap rig for your character.
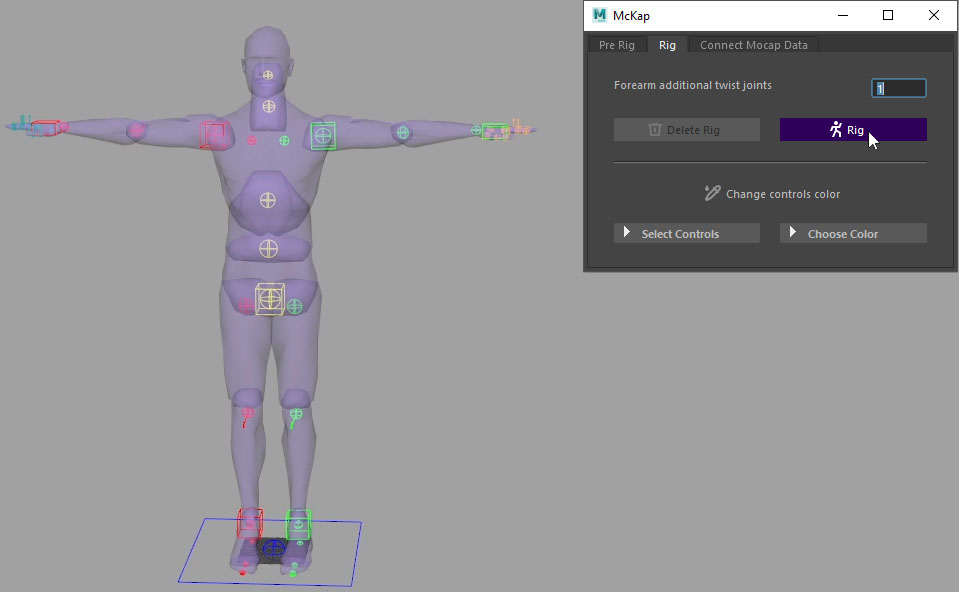
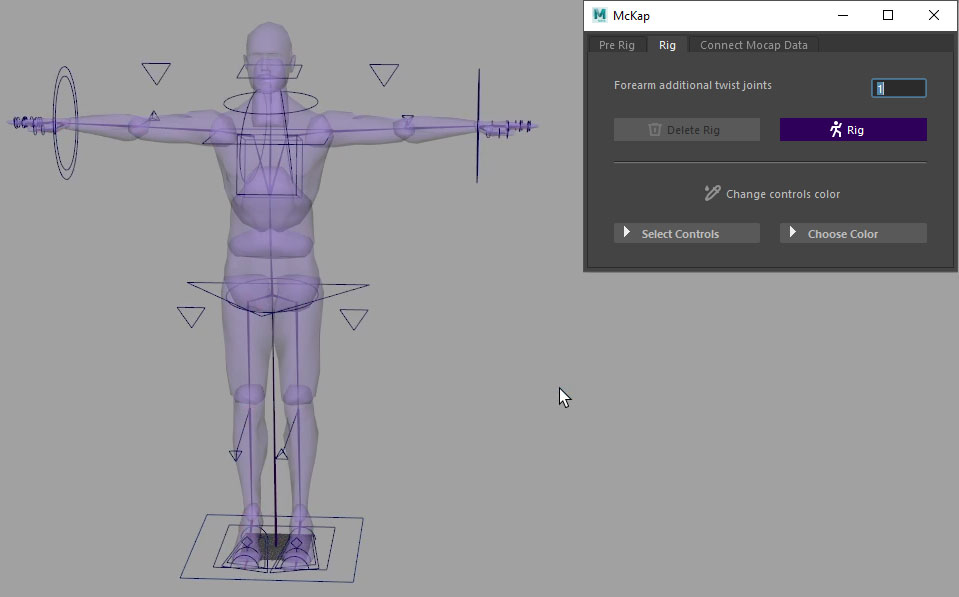
- Your McKap rig is now created.
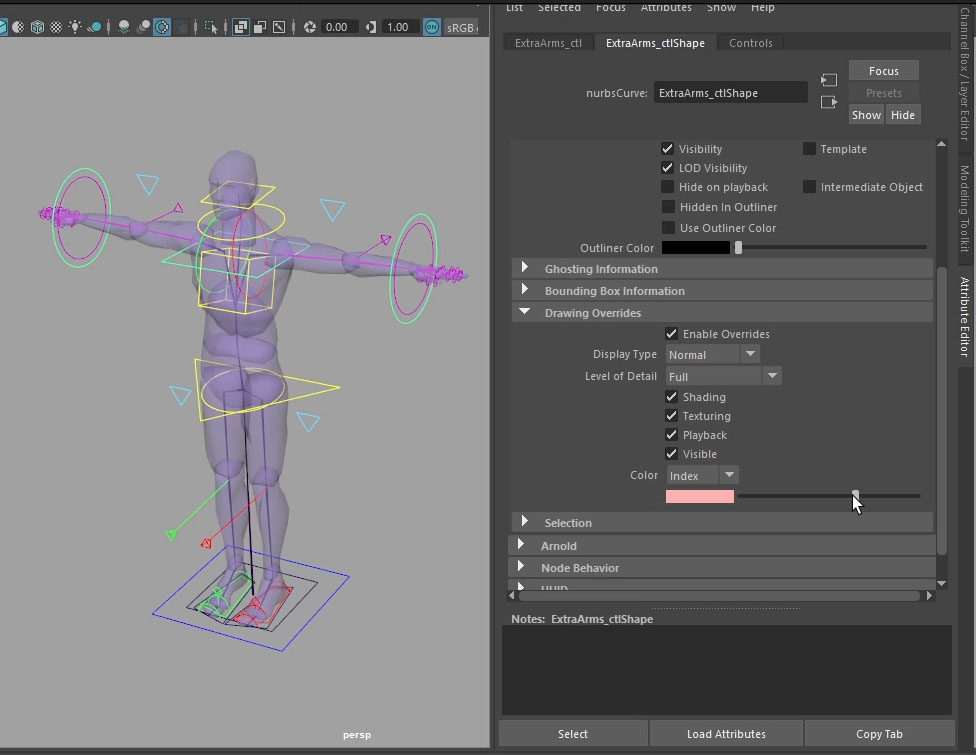
- You can use the McKap interface to assign colors to the controls.
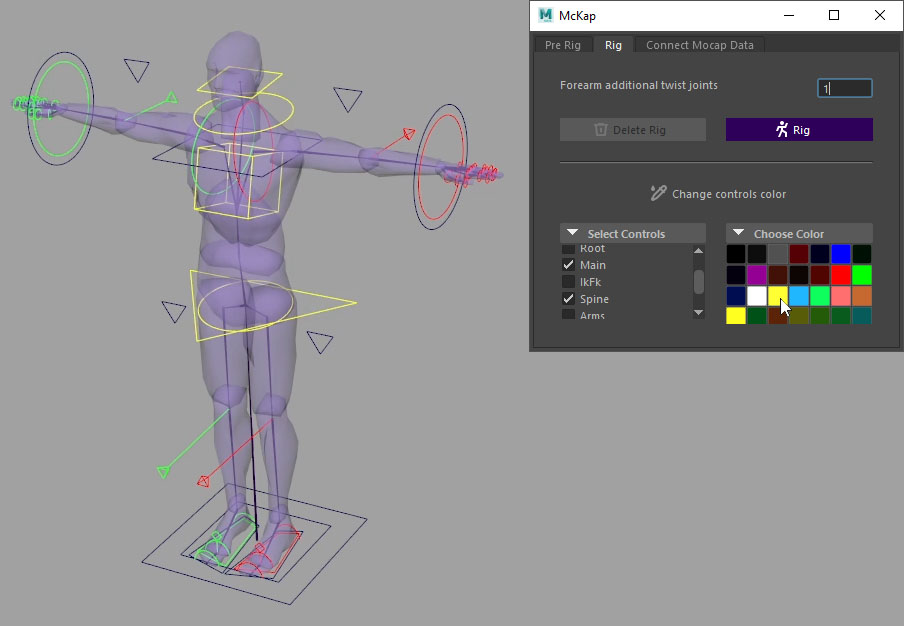
- You can also do this manually.
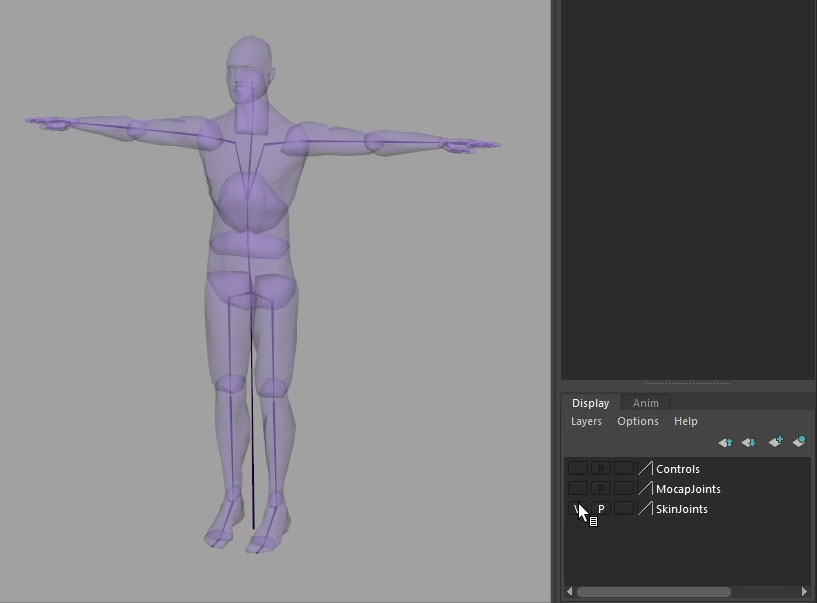
- Joints intended for skin binding can be easily accessed with the SkinJoints layer.
- McKap features both IK and FK arms, legs and spine controls.
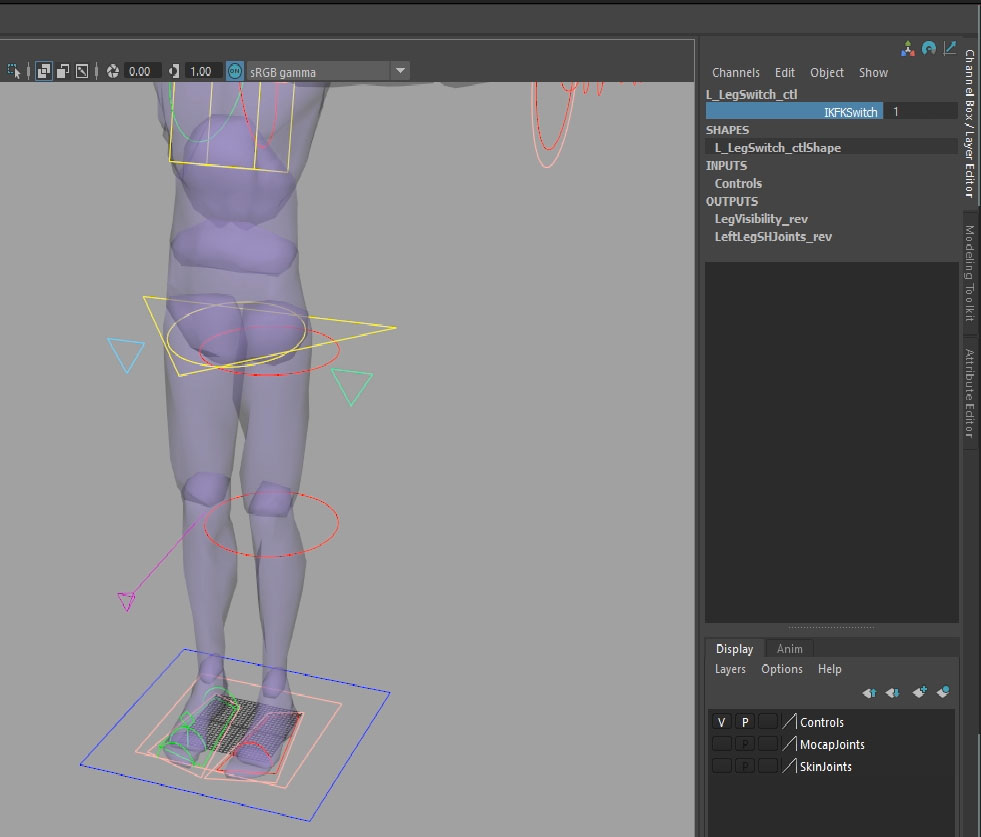
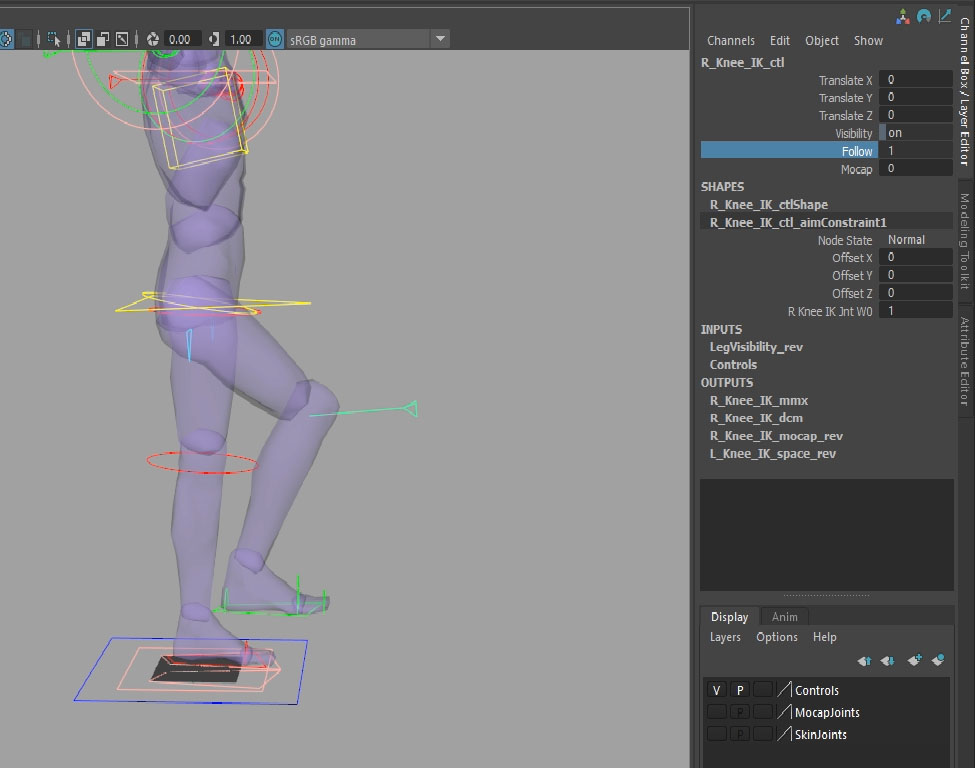
- Knee and elbow controls can remain independent or follow the feet/hand controls.
- You can take the time to adjust control shapes to fit your character.
- Don’t forget to save your file.
- Reference your character rig created with McKap.
- Import the motion capture file you wish to work with.
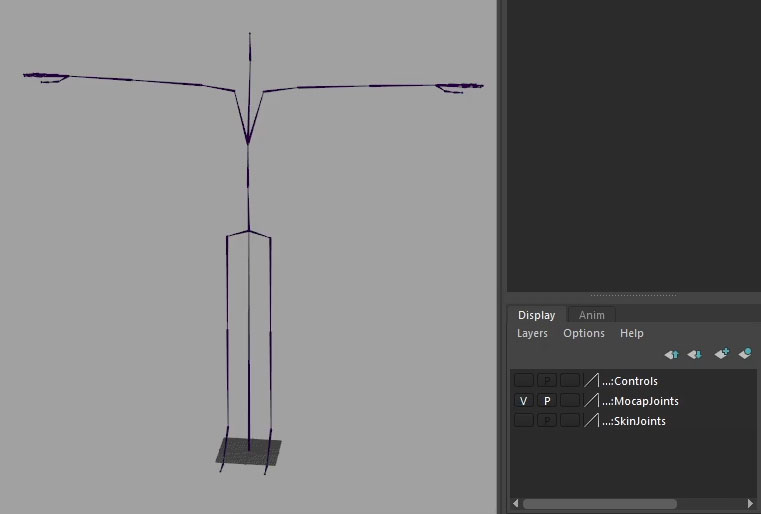
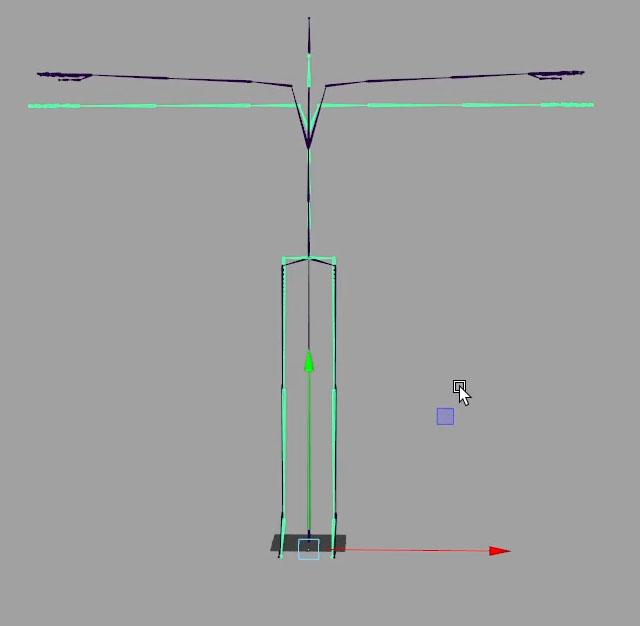
- McKap has a skeleton that drives the character rig. The motion capture animation needs to be connected to the McKap driver skeleton.
- For best results, scale the motion capture skeleton so that the leg length matches you character, and align the pelvis to your character.
- Make sure the poses of the two skeletons match at the start frame.
- Adjust either skeleton to achieve this if necessary.
- You need to tell McKap what rig you are working on.
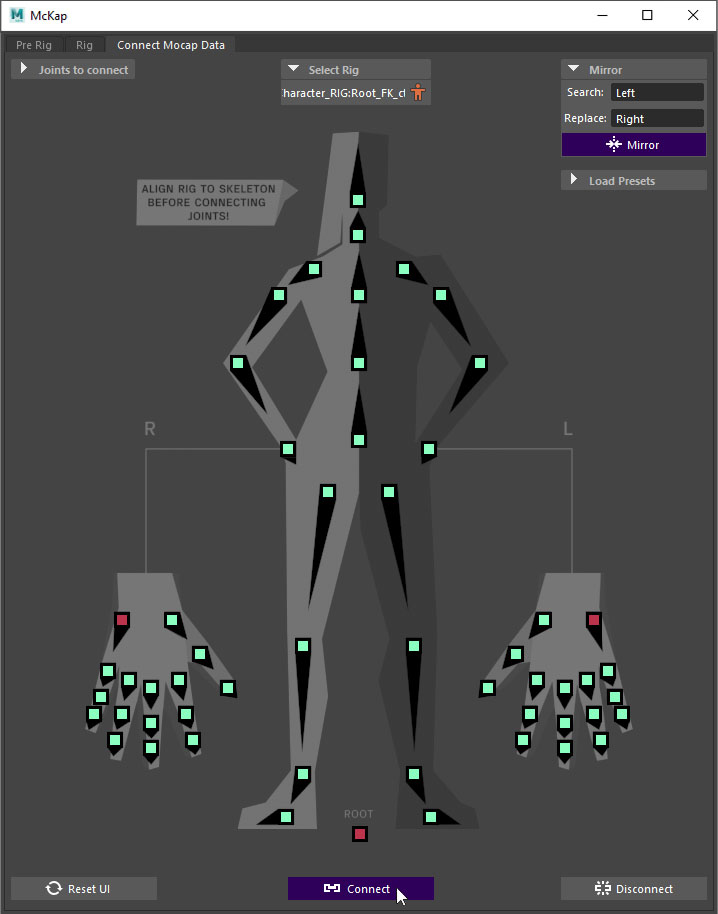
- Open McKap window and go to the Connect Mocap Data tab.
- Select the main control of the rig you wish to work on.
- In the drop-down menu Select Rig, click on the icon on the right.
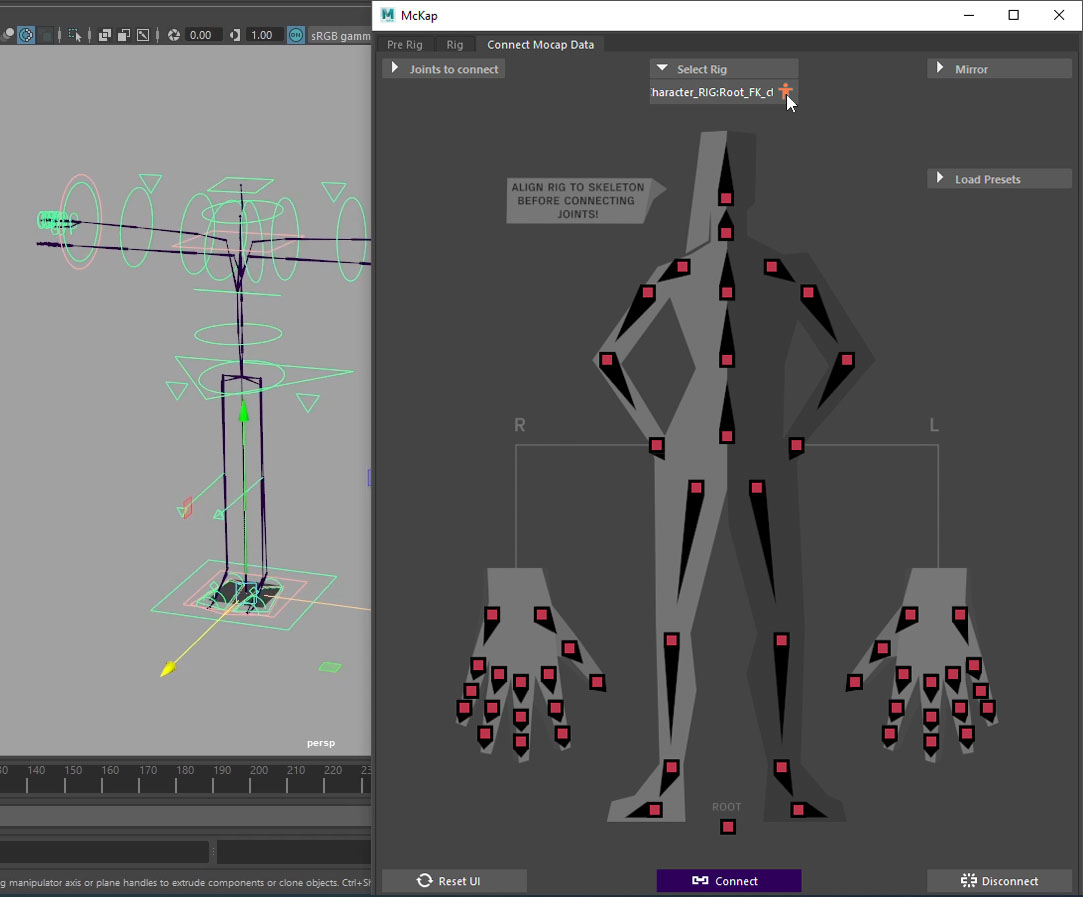
- Select a joint on your motion capture skeleton, and click on the corresponding box on the McKap window.
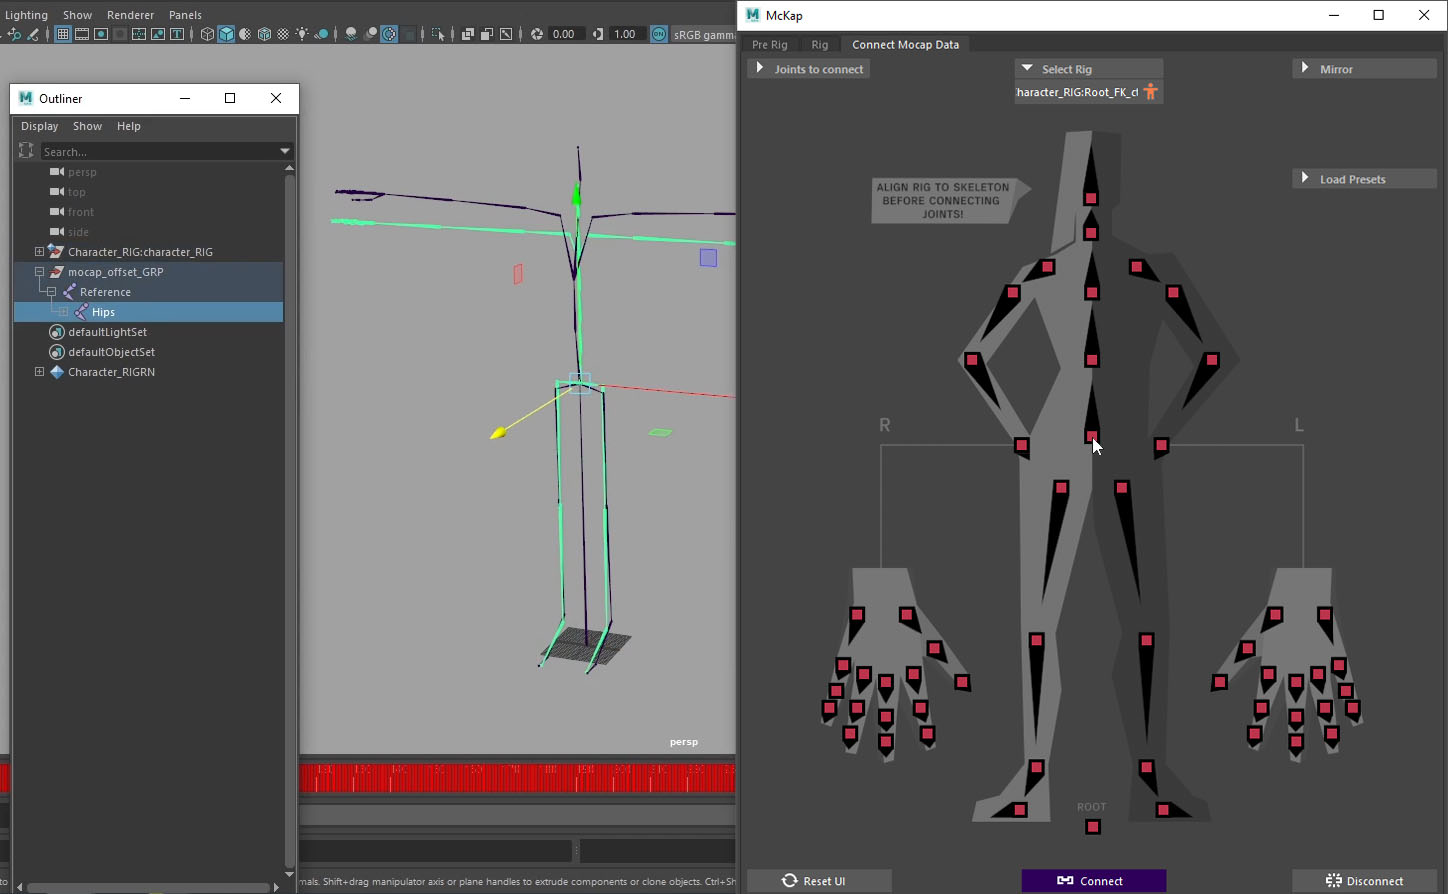
- The box will turn green, indicating the selected joint is loaded.

- Tip: you can use the arrows on the keyboard to move quickly through the joint hierarchy.
- If possible, use the Mirror, Search and Replace feature to automatically load joints to the opposite side.
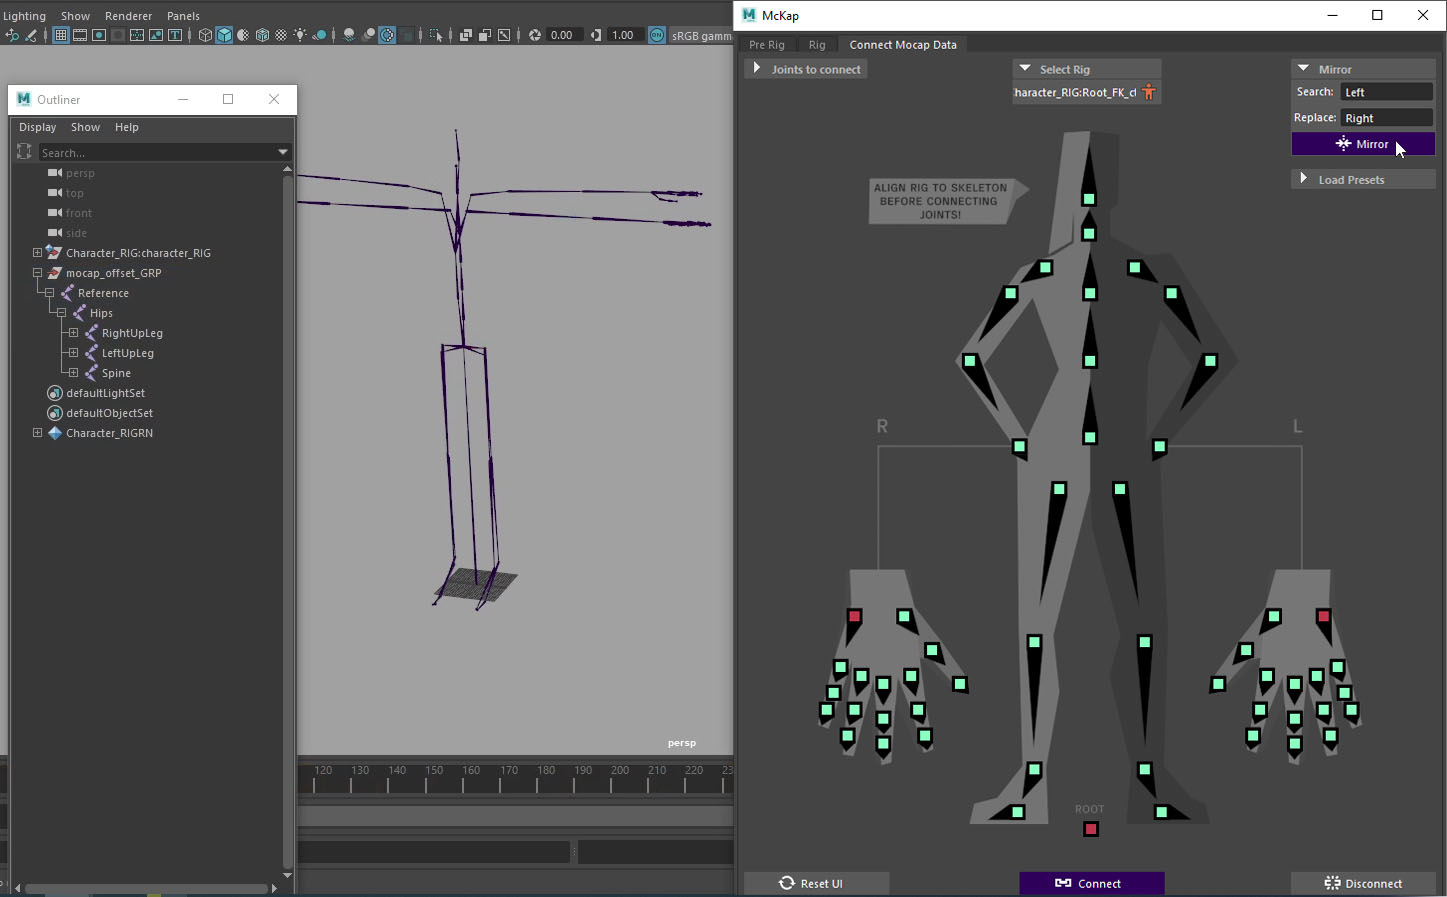
- Make sure all the joints are loaded in corresponding boxes.
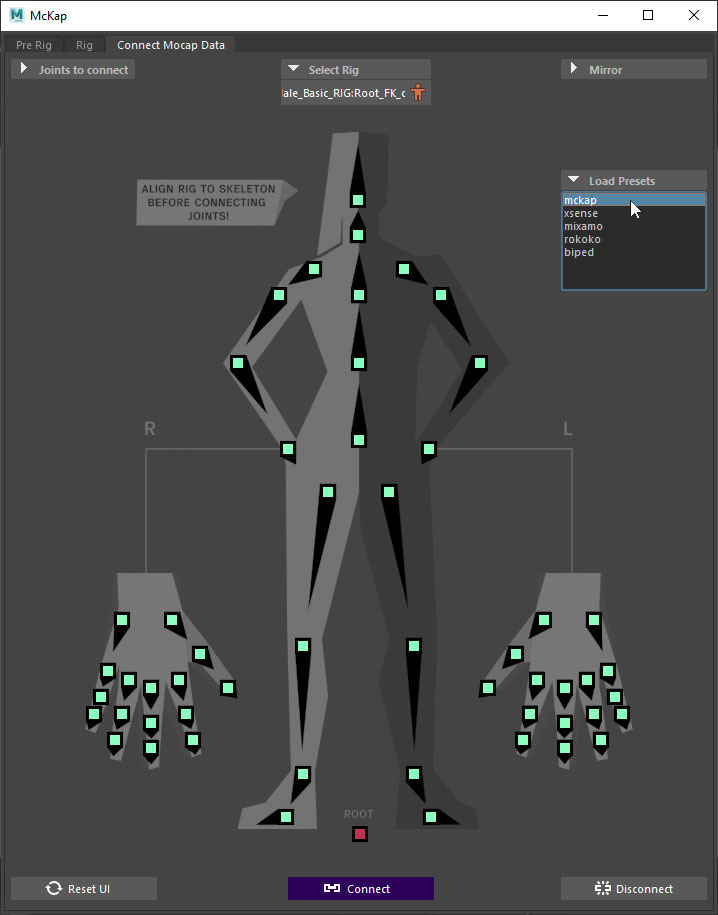
- For the most common motion captures, you can also use one of the presets.
- Click the Connect button to connect your motion capture skeleton, to the McKap driver skeleton.
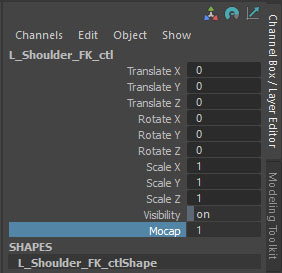
- To set the weight of an individual control blending with the motion capture, use the Mocap attribute.
- The value 1 means follow the motion capture completely.
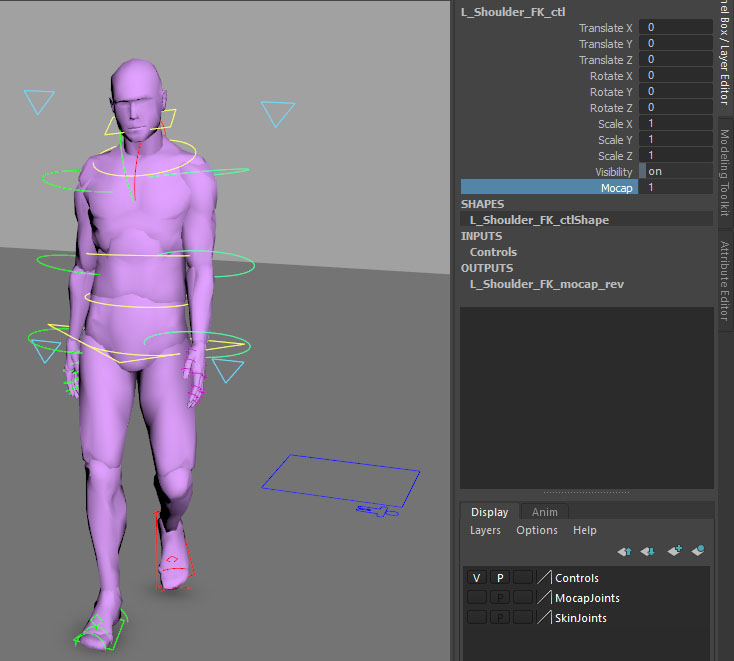
- The value 0 means do not follow the motion capture at all.
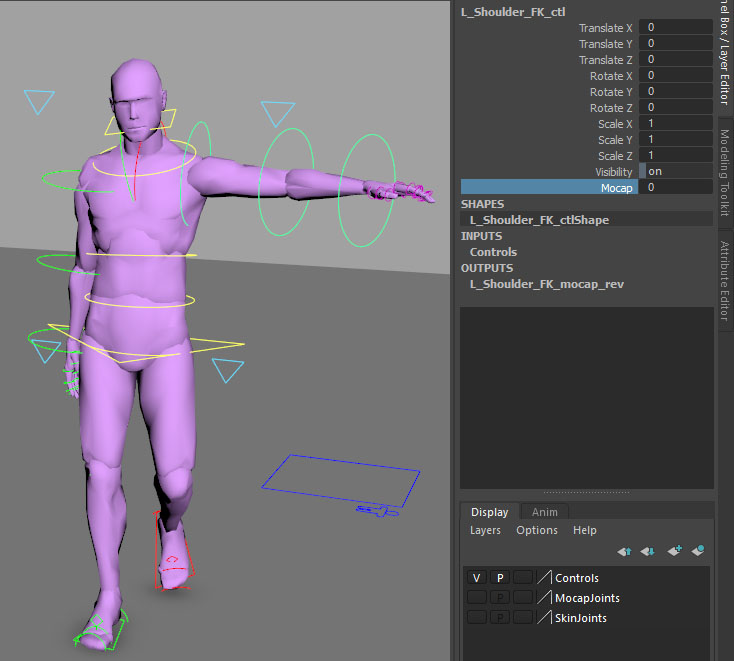
- Animate the Mocap attribute to easily blend between motion capture and custom animation.
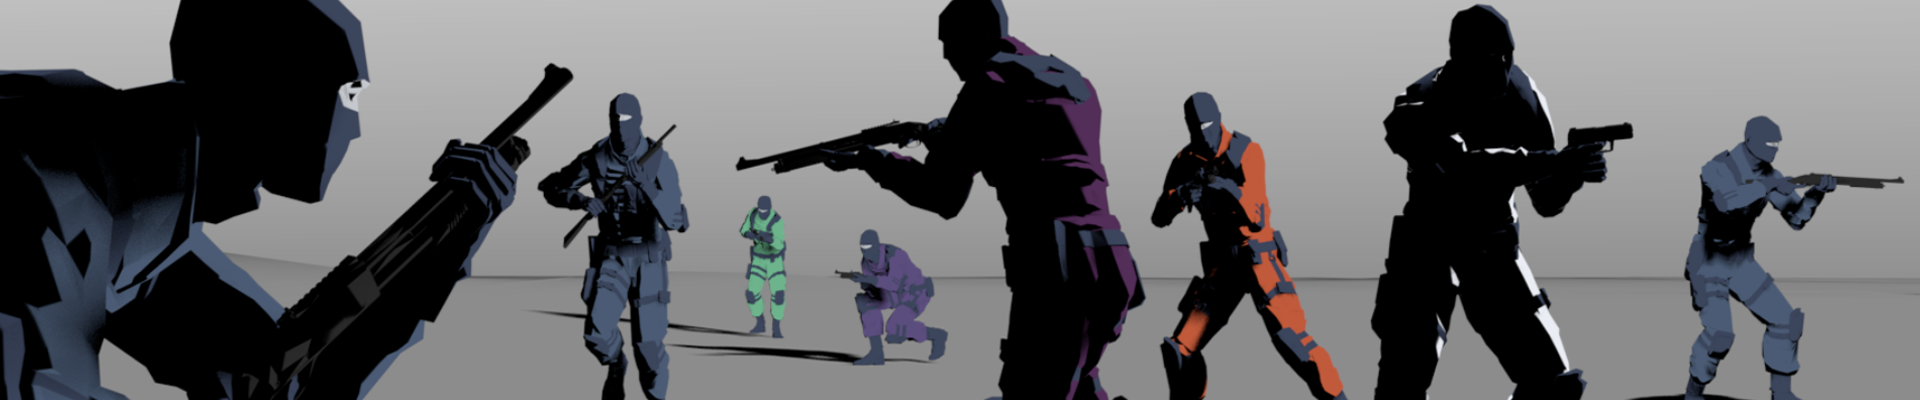
- McKap Starter Pack contains more than 50 motion capture recordings and 16 rigged characters.
- Locate the McKap Starter Pack folder:
C:\ProgramData\Autodesk\ApplicationPlugins\McKap\Contents\starter-pack
- Note that ProgramData folder is hidden. In Maya’s File > Open dialog, right click over the main explorer window, enable Show hidden files checkbox.
- Open the Animation Template scene (Female_ANIM_Template or Male_ANIM_Template).
- You can simply File > Import… any mocap animation from the Starter Pack. Mocap is already connected to the rig.
- Use Reference Editor to simply replace the rig.
- Make sure that you re-open your Animation Template scene for each mocap. Importing several mocap files consecutively in one scene can cause errors.
-
McKap Starter Pack
McKap Starter Pack contains more than 50 motion capture recordings that you can quickly load to 16 rigged characters. Find out more...
Read More -
Animation Template workflow
Animation Template workflow allows you to quickly load motion capture files (that are using the same skeleton) to your rig without having to connect/retarget each time. Find out more...
Read More